
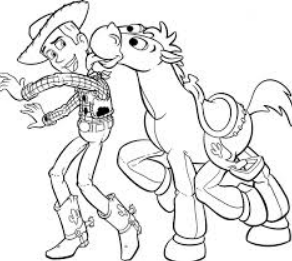
Drawing Woody is attracting only 6 simple tasks! The Toy Story film sequence is one of the multiple special places ever made. There are four flicks in the Key series and countless television shows, computer games, books, and other merchandise centered on these characters. You may also learn many things cartoon drawing, scary drawing, cartoon drawing, drawing girls cute drawing, flowers drawing, cute drawing, puppy drawing, and dog drawing.
One of the main characters is the toy cattle rustler, Woody. Fans love this man for his ironic yet respectable nature, and his quest to figure out how to be less wanting and dependent on his friends has captivated crowds. Discovering how to draw Woody is a great way to get to know this exemplary person! If you like this person, there will be much to appreciate in this educational exercise. Our step-by-step guide on the most effective way to attract Woody in just 6 steps will show you the best way to reproduce this famous cowboy toy effectively. The most effective method of attracting woodiness 6 stages
The most effective method for drawing Woody. What if we put everything in motion? Level 1
This first step of our wizard in the most proficient drawing method, Woody, will see you start drawing by drawing his head. Woody’s head is very thin and long, so you can start by setting a narrow boundary to create this shape, as shown in the reference image. Next, set a more modest bent limit for the base of your neck below.
Then, at this point, draw her ears as an afterthought with some awesome lines for her hair on the sides. Woody often wears his famous Texas-style cap, so we’ll also start drawing that. Set a narrow boundary above your head, then add another above for the highest point of the cap. As long as you have drawn these perspectives, you are ready for step 2.
Step 2: Draw his facial highlights and chest.
The most efficient way to draw woody stage 2 To continue with his drawing of Woody, we will next draw his elements and chest. For the facial elements, we’ll start with his eyes. Her eyes are round, so some huge rounds alternate within them. Her eyelids will also be a bit droopy from her appearance. Then, you can draw his eyebrows using simple shapes and then draw his nose and smiley mouth below.
Then at that time, we will draw his chest. Woody is wearing a cowhide vest, and Woody has his star-shaped sheriff’s ID card ready to go. Then, at that point, pull the controls of his shirt between the vest, count his scarf, then remove his strap. Pulling the sheath over the left half of your abdomen is the perfect opportunity for step 3.
Step 3: Currently draw his arms
In this help on the most effective method to draw Woody, we will depict him in a powerful running pose. To make this work, we’ll start by drawing his arms. His arms are made of padded texture, so they swing wildly as he runs. Use curved lines to represent your arms, with the left one figured down. The right one will be raised a bit, and we’ll glimpse the hand on that arm. Be sure to draw the fitted square-shaped areas of her sleeves onto her wrist too! It’s as simple as that now, so now you can continue.
Step 4: Following, celebrate the start of his fragments.
Like his arms, Woody’s legs are made of a soft plush texture. As we draw them, they will wiggle accordingly as the arms did. The portion on the left flank will be more refined and more extended forward than the other. This other leg will be slightly more curved, which will help show that you are in the middle of the current. You can also start drawing your boots’ top edges and first segments under your legs. We’ll leave the bottom of the boots raw for now, but you’ll tweak them with the final niceties in the next step.
Step 5: Add the final subtleties to your drawing of Woody.
This stage of our help in the most proficient method of drawing Woody will be related to polishing the final components and intricacies. To start, we’ll draw the bottom of his boots. For the left boot, we will see a to